


One of the most powerful features of SwiftUI is its ability to adapt automatically to different screen sizes and orientations. In this SwiftUI GeometryReader article we are going to response How to provide relative sizes using GeometryReader?
SwiftUI GeometryReader is a view that allows you to get the size of a view, which can be useful for various tasks, such as positioning other views within it.
We can access properties like height and width that can help us dynamically set the aspect and position of a view and ensure that it will look good on any device independent of screen size.
In this article, we'll explore the benefits of using SwiftUI GeometryReader and we'll provide some examples of how to use it in your projects.
-> Check our SwiftUI Button Tutorial
-> Check our SwiftUI Picker Tutorial
-> Check our SwiftUI List Tutorial
SwiftUI GeometryReader Responsiveness
One of the biggest advantages of using SwiftUI GeometryReader is its ability to create responsive user interfaces. When designing a user interface, it's important to consider different screen sizes and orientations.
With SwiftUI GeometryReader, you can easily access the size and position of a parent view and use that information to create a responsive layout that adapts to different devices and orientations.
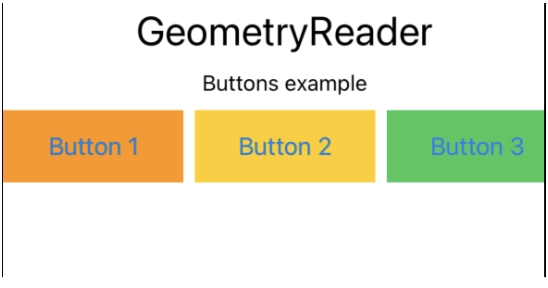
For example, let's say you have a view that contains a series of buttons. You want the buttons to be evenly spaced across the screen, regardless of the screen size or orientation.
You can use SwiftUI GeometryReader to calculate the screen's width and then use that information to distribute the buttons evenly.
Here's an example:
CODE: https://gist.github.com/devs-rootstrap/acded95605fa74f62a45012a15e8f81c.js?file=geometry-reader-buttons-example.swift
In this example, we use a SwiftUI GeometryReader view to calculate the width of the parent view and divide it by three to create three evenly-spaced buttons.
SwiftUI GeometryReader Layouts
SwiftUI GeometryReader view can also be used to create custom layouts that would be difficult or impossible to achieve using other methods. By accessing the size and position of the parent view, you can create complex layouts that adapt to different devices and orientations.
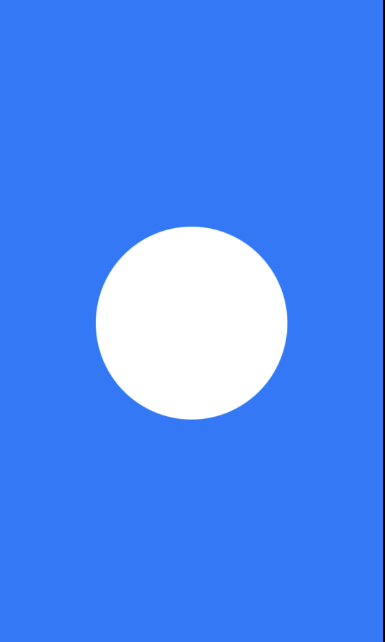
For example, imagine you have a view that contains a rectangle and a circle. You want the circle to be centered in the rectangle, and it should fill the 50% available space based on the screen width.
You can use SwiftUI GeometryReader to calculate the size of the parent view and then use that information to create a circle that adapts to different screen sizes.
Here's an example:
CODE: https://gist.github.com/devs-rootstrap/acded95605fa74f62a45012a15e8f81c.js?file=geometry-reader-circle-example.swift
SwiftUI GeometryReader Alignment
SwiftUI GeometryReader alignment can also be used to align views within a parent view. By accessing the position and size of the parent view, you can easily align child views to specific positions within the parent view.

CODE: https://gist.github.com/devs-rootstrap/acded95605fa74f62a45012a15e8f81c.js?file=geometry-reader-rectangle-example.swift
In this example, we use a SwiftUI GeometryReader to access the size and position of the parent view. We then create an HStack with two rectangles, each half the parent view's width and height.
We align the left rectangle to the center of the parent view using the alignmentGuide modifier with a value of .leading and the right rectangle to the center of the parent view with a value of .trailing.
Final Thoughts about GeometryReader
SwiftUI GeometryReader is a powerful tool for creating responsive, adaptive, and custom layouts.
Learning to use GeometryReader in SwiftUI is a great way to improve your skills as a developer and create more dynamic and responsive user interfaces.
With the ability to create layouts that adapt to different devices and orientations, your apps will be more user-friendly and accessible to a wider audience.
So, it's worth taking the time to learn and master this powerful tool in SwiftUI.


