


CI/CD services are popular in development because they offer benefits such as fast and frequent software delivery and quality code maintenance.
Xcode Cloud is a CI/CD service built into Xcode that allows you to test and distribute your apps through Apple's servers.
This article provides a step-by-step guide on creating your first workflow, which automates the distribution process to TestFlight.
Setting up Xcode Cloud
Before starting, please make sure you meet the following requirements to set up your environment.
(1) Account
(a) Your dev account should be enrolled in the Apple Developer Program.
(b) The same Apple ID must be added in Xcode.
(c) An app record for your app must exist in App Store Connect, or you must have the required role or permission to create one.
(2) Project and workspace
(a) Use a consistent Xcode project or workspace.
A consistent Xcode project or workspace is the same across all team members and machines. This means that the project or workspace file and any dependencies should be identical for everyone working on the project. This ensures that builds and tests will behave consistently across all machines and the workflow will function as expected.
(b) Use shared schemes.
(c) Archive action should be enabled for the scheme that builds your app or framework.
(d) Use automatic code signing.
(e) Set the bundle identifier for your app target in the Signing & Capabilities tab of your Xcode project or workspace. This should match the bundle identifier added in the App record in AppStore Connect.
(3) Source control
Currently, Xcode Cloud supports the following SCM: Bitbucket Cloud and Bitbucket Server, GitHub and GitHub Enterprise, and GitLab and self-managed GitLab instances.
Configure Your First Workflow
To configure your first workflow, follow these steps:
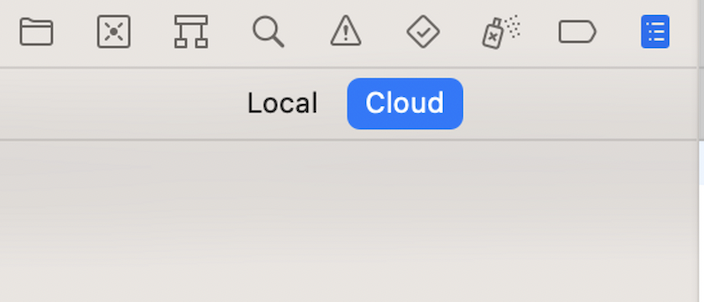
- Open your project in Xcode, go to the Report Navigator, and select the Cloud section.
- Press Get Started and select the product you want to connect with Xcode Cloud.
- Configure your preferred workflow. Xcode provides you with a default workflow; reviewing it to see if it’s suitable for the project is recommended.
- Choose which branch will execute the workflow under the desired condition in the Branch Changes section.
.png)
- Add the workflow's actions, such as Archive, Test, Build, or Analyze, by tapping the '+' symbol. You can add the Archive action to automate your build distribution via TestFlight and ensure that AppStore Connect is selected under Deployment Preparation.
.png)
- Configure Post-Actions, such as sending an email or a Slack notification if the process fails or succeeds. To configure a Slack connection with Xcode, refer to the following documentation.
- Grant access to Xcode Cloud to your repository by clicking on Grant Access and following the steps where your repository should be selected.
Now, you’re ready to upload your app. You can start immediately after the workflow configuration, or it will execute automatically after you push it to your branch.
.png)
Additional Considerations
Some projects use local machine configuration files, so upload them to the remote repository. Additionally, you can use environment variables if the project uses secret keys, and remember to mark them as secret.
.png)
Dependencies
CocoaPods and Swift Package Manager (SPM) are the project's most commonly used dependency tools. You can follow the steps below for each case if you use either.
CocoaPods
- Create a new folder named ci_scripts next to your project or workspace.
- Inside this folder, add the following script and name it ci_post_clone.sh. Make the script executable by running chmod +x ci_post_clone.sh in the terminal. Remember to push it to your remote repository.
CODE: https://gist.github.com/kstoletniy/3ba281abe8a9ac31dd3cb268d327a480.js
Swift Package Manager
If your project uses SPM, the Package.resolved file should be present in your remote repository. You can find it at the following:
[app].xcodeproj/project.xcworkspace/xcshareddata/swiftpm.
Usage Data
Review your usage data directly in App Store Connect by clicking the Xcode Cloud tab. The usage minutes will depend on the number of tests in the project or the duration of building/archiving.
.png)
You have a certain number of computed hours based on your chosen subscription plan. Until December 2023, you have 25 hours per month available for free. Check out the currently available plans on offer.
Conclusion
Xcode Cloud is a great and easy-to-use tool for automating the testing and distribution process of iOS apps. Its CI/CD capabilities are a great advantage for Apple developers.
I invite you to try this tool, which I'm sure offers many more benefits beyond those mentioned in the article
What do you think of Xcode Cloud? Let us know in the comments section!

