


When you register a model in your Django admin page it automatically matches each of the model’s fields to a widget so you can input data and manage instances of the models easily from the Django admin panel. Most of the time the default widgets are enough but in some cases, they may not be the most suitable for your particular needs.
For instance, let’s say one of your models has a DateField representing the birthdate of a user, and let’s also say that for whatever reason you will need to create user instances frequently from the admin panel, maybe for testing purposes.
Then the default DatePicker may be inconvenient if you want to input realistic data, as you can’t input the year in a straightforward way and would have to navigate month to month to reach your desired year.
In that case, you may want to change the widget to pick the date. If after doing some research you don’t find a clear explanation on how to do this, don’t worry, because not only is it pretty easy but I will be guiding you through in this article! Let’s begin.
Setting Up
In this instance, I’m going to assume that you have python and Django installed as well as a project ready for which you are going to make these changes.
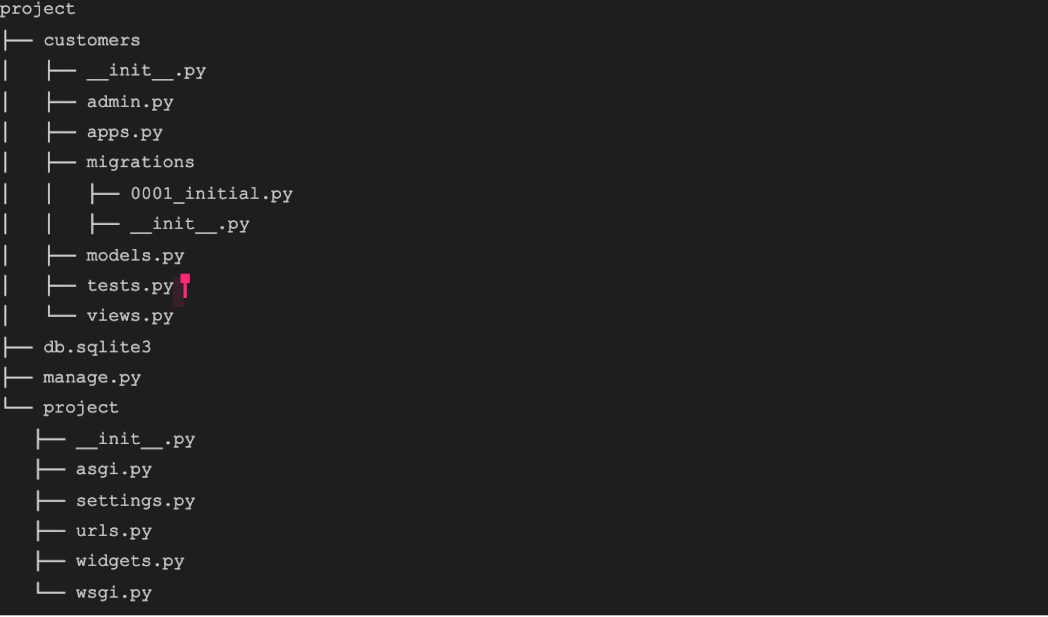
In my case, I made a very simple project called project with just one app called customers and the following layout:
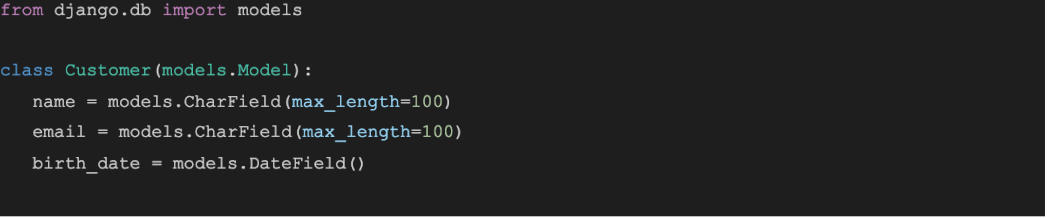
We will be working in the Customer model in customers.py which looks something like this:
After registered the model on the admin page, when we try to create/modify a new instance from the admin panel it will look like this:
As you can see, picking a date from just a few years ago can already be very tedious, so just imagine how difficult it would be to search for a birthday.
We will now change this widget for a new one that makes navigating through years easier and more fitting to handle specific birth dates.
Changing the Widget
We will define a new Datepicker, first off a generic one with the specific date format we want to use. Then we will create a more specific one that inherits from it and also doesn’t allow the user to input dates that don’t make sense as a birthday (i.e. future dates).
It all boils down to which date format the widget uses – the date format that the default widget enforces is day-month-year.
Our new CustomDatePickerWidget will require the year-month-date format. To define these new widgets, let’s create a new file widgets.py which in my case, I will create at project/project/widgets.py with the following code:
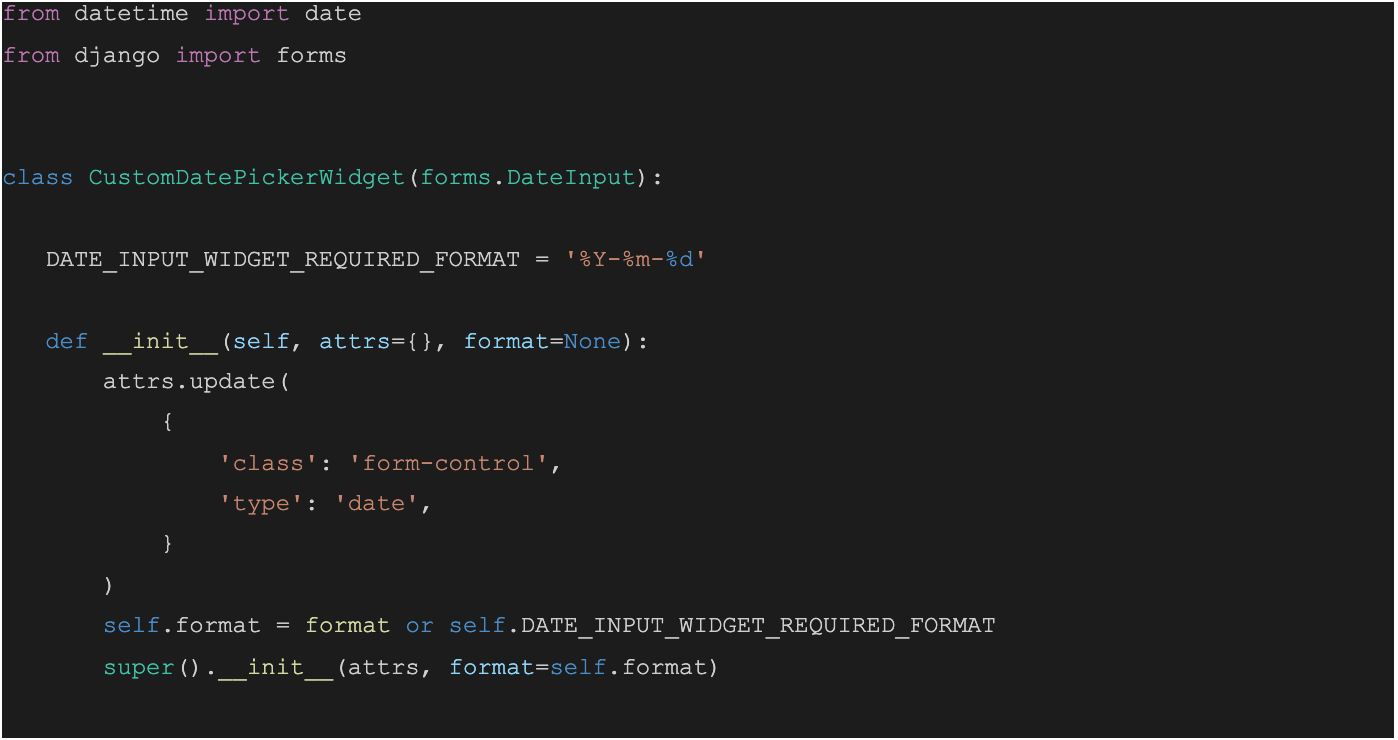
Here we are defining what date format the input is gonna enforce (%Y-%m-%d meaning year-month-day) and in the class constructor we are doing two things:
– Adding class: form-control and type: date to attrs which is important to ensure that a calendar widget will be displayed from where we can select a date (if we didn’t the input displayed for this field in the form would be a plain text one).
– Setting %Y-%m-%d as the class’ format attribute if no other format is provided as an argument.
Then we are simply calling the parent class’ constructor to handle the rest.
With this, we already have a widget that addresses our main concern of navigating through years in a convenient way, and you can subclass it to more specific properties to better handle your use case.
For our Customer model since we will be handling birth dates, we also want to make sure that no future dates will be used as input, so in the same file just under this class we will define:
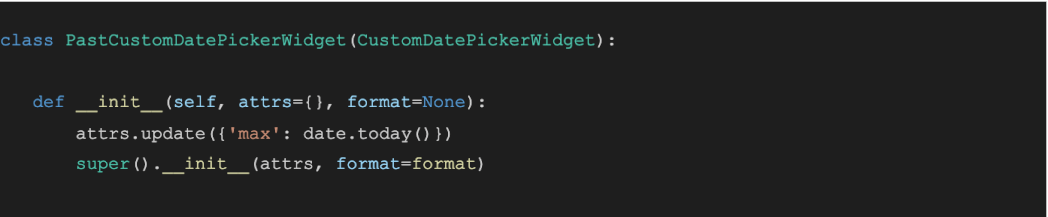
As you can see in the constructor we update attrs specifying max as date. today().
Now, with our new widget defined we just need to use it where we registered the model in the admin page to override the default one.
At project/customers/admin.py, I already had a CustomerAdmin which was the class I used to register the Customer model on the admin page. In my case, it was empty so I am going to add the following code:
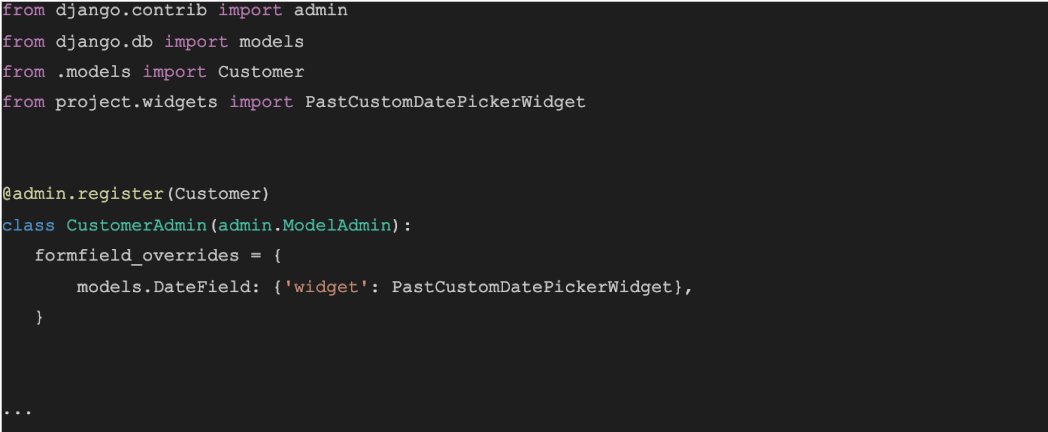
What we are doing here is importing the DatePicker and using it as the value for the widget in the formfield_overrides as shown in the code.
And that’s it! Now we can input birth date values in a much more comfortable manner instead of scrolling through months endlessly!
Conclusion
In this blog post, we discussed how to create a new custom DatePicker for Django and how to use it as the default DatePicker on the Django admin page.
I hope you enjoyed it and found it useful, thank you for reading, and stay tuned for more similar content!


