
Have you ever found yourself stuck during the construction of a component?Perhaps not with simple ones like icons, but what about a button with different states, icons inside, and secondary, tertiary, or even more variants? How many times have you hit a roadblock and wished you had put a bit more thought into it before jumping in? Many times? Or maybe you are like me, a person who was too blind to even see that it was taking me more time and effort to build components due to the fact that I wasn’t thinking about structure prior to taking action.
Many times, we don’t see the flaws in our processes, at least not until we’ve repeated them so many times that the obvious becomes so big that we would be idiots if we didn’t see it. Well, that was me 🙂
After going through the same repetitive steps of creating complex components, after dedicating 5 years of my life to working as a frontend developer, and after working on different projects and needs, I finally discovered that one of my pain points was jumping too early into action.
When I started using this approach, I noticed that I gained speed, resolution, and even mental agility. Soon, I didn’t even need to go through the sketching phase, since all the necessary questions were already wired in my head. I was able to mentally build a 3D model in my brain, and perform the task with ease. That’s why I recommend starting with the following steps to gain momentum and wire proper connections in your brain. This way, you can later perform the task mechanically and from the top of your head, with no effort.
Steps to build
1. Think of the reasons
Cliche, but still valid right?
I have noticed that regardless of whether you jump right into construction or take time to think before acting, you end up asking yourself the same questions and encountering the same roadblocks. The only difference is that encountering them earlier reduces wasted time, effort, and frustration. This is similar to wireframing flows during the inception of a product. It is always better to stumble upon complex steps or even bad UX during these stages rather than realizing them when you have pushed the production work to staging.
Here are the things you should think about:
- Why am I doing this? What is the reason for building this component? The idea is to justify a set of reasons, so that they are in the back of your head. Is it due to repetition patterns, product-specific needs, documentation, grouping elements together, or a combination of all of the aforementioned reasons?
- Goals and Usage. What am I trying to achieve with this, and what will be its primary usage? For example, if I’m building a button component, the main goal is to create a clear component where I can check its different states, variants, and behavior. This simple sentence already provides valuable insight into how to document the component and how many possible properties it could have. You can drill further and ask: is this a component that is gonna live among other entities? Is it an interactive component? How would I use this component if I had it ready already? This will give you insights on the usage, and how designers will interact with it.
- Expected Behaviors. You have already defined why you are implementing this feature, its goals, and usage. Hopefully, this sheds light on answering this item on its own. The idea is to consider the behaviors this button will have. For example, let’s consider the button’s default, hover, focused, and disabled states. Additionally, this product requires three sizes of buttons, and there are three different hierarchies where primary has one look, secondary another, and tertiary buttons have a similar look to what could be a link. Should the button have icons? If so, where should they be placed? On the left, right, or both? Are there any other special cases or behaviors to consider?
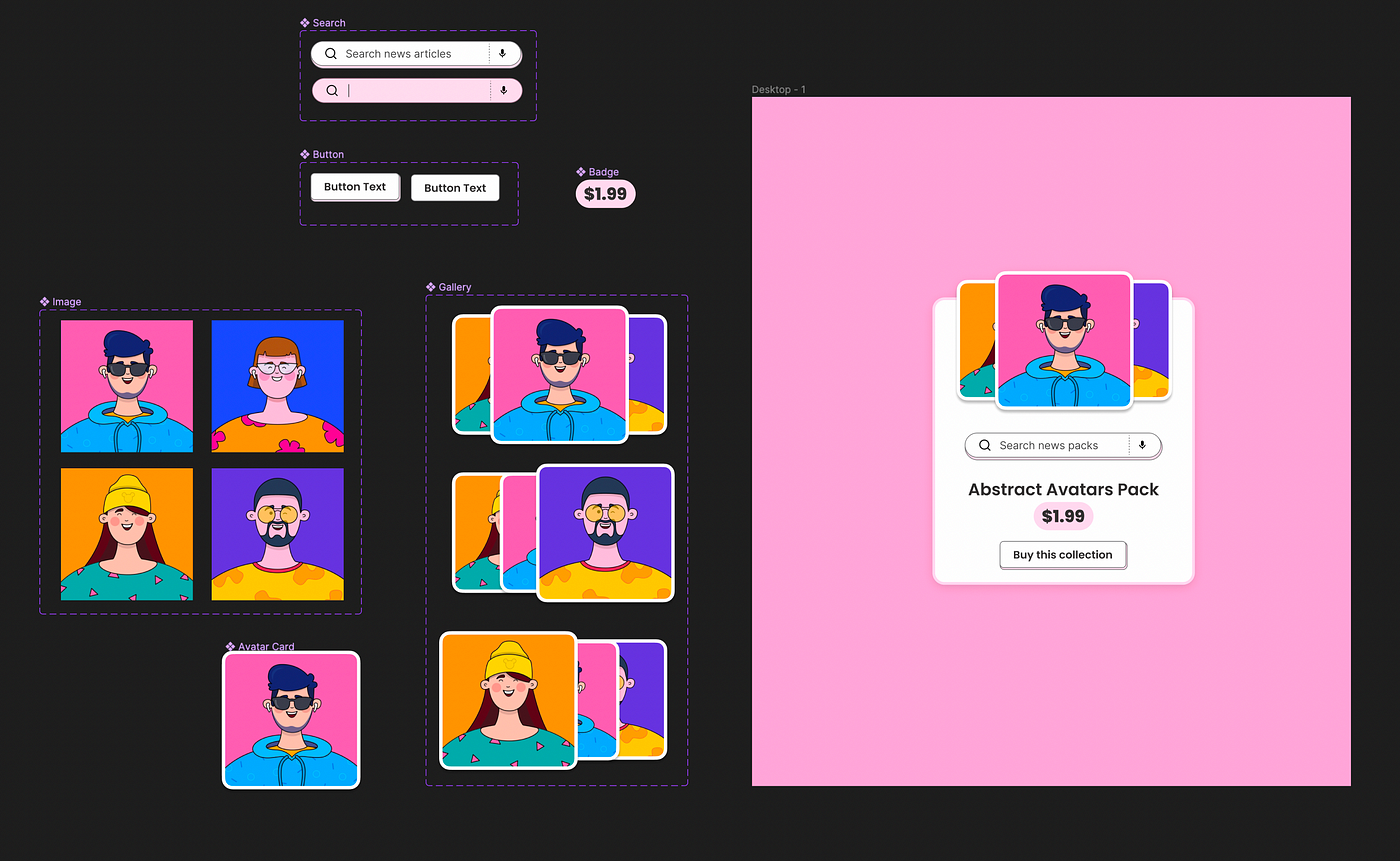
- Nested components. You have identified the structure of the components. Are any of the items inside already separated components, or do they need to be transformed? For instance, my button might need to have some Icon instances that can be swapped later, since not all of them will use the same Icon. This is the simplest scenario, but consider something more complex, like a card component that may have an image, title, paragraph, and some call-to-action buttons. This suggests that we might have nested components. We may need to swap out the featured image, adjust the button size, or even transform the body content from a title and text to a title and bullet list. These decisions will depend on the product’s usage and requirements and the processes we have in place.
- Logic and delegation. After identifying the structure and components, you can begin thinking about the logic within each component and how to delegate tasks as needed. For example, if you need to display different contents inside a card, that could be a responsibility of an outer component. There’s no need to complicate the card component when it could simply be a container that’s agnostic to the content being injected. Determine which logics will be handled by your component and which will be part of other components, such as a button changing size or content swapping.
2. Draw a mental model
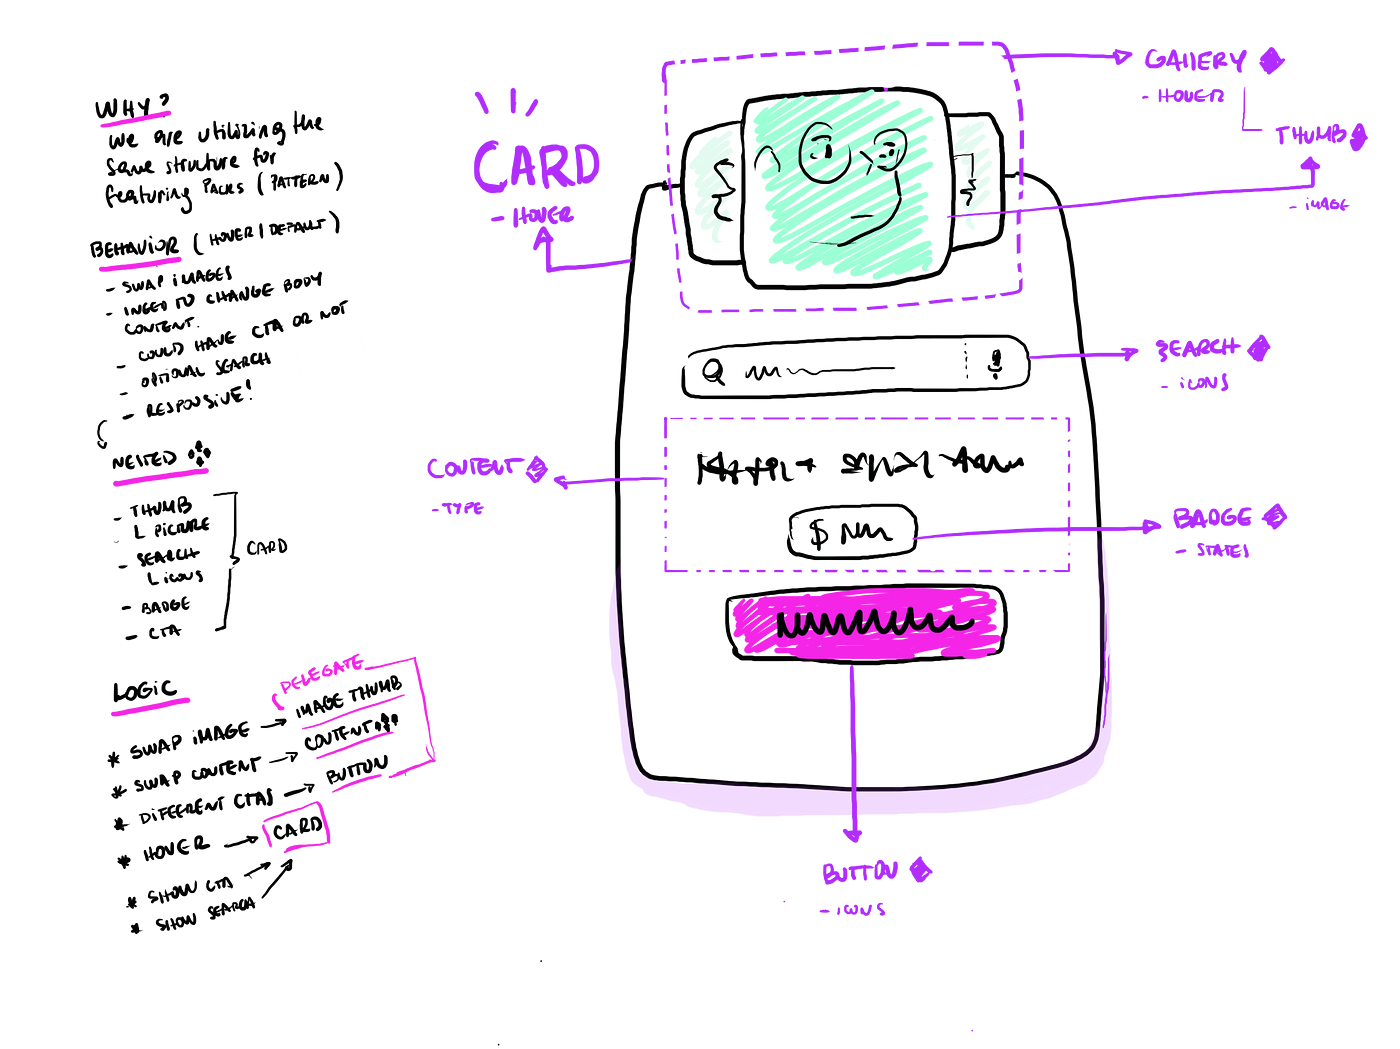
Grab a napkin, a piece of paper, your iPad, or Figma itself, and without investing too much effort get the structure out of your head.
Many times we jump straight into building with a vague notion of what we want (usually can be accurate), but as we start building we encounter roadblocks, or even dead ends in which we have to stop and rethink everything we did so far. I’ve been here many times 😛, I get carried on with the excitement of adding lots of features or toggles to my component (properties) and easily loose the focus of why I was doing it, and the reasons behind.
Drawing time
- Create a mental map for the structure
- Create a list of props.
The above example serves to illustrate the mental process we need to go through when engaging in a component creation phase. While it may seem simplistic when viewed outside of our own heads, it is important to remember that we are simply allowing our thoughts to solidify and be recorded for future, rapid repetition.
3. Apply
Here are some things to consider when creating your component:
- Have I covered all the necessary behavior and usage definitions? If your answer is yes, great 👏 ! If not, you may need to review your component’s properties and functionality to address any missing needs.
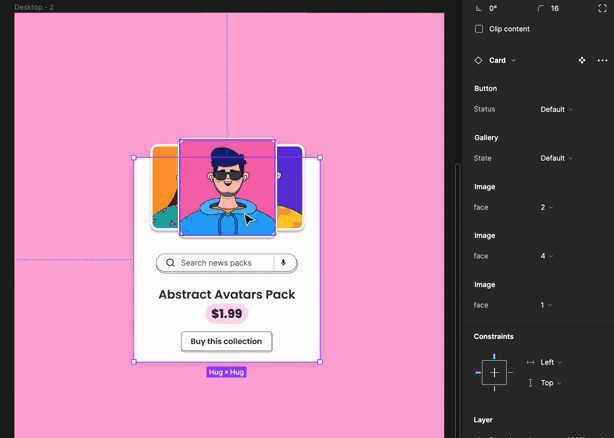
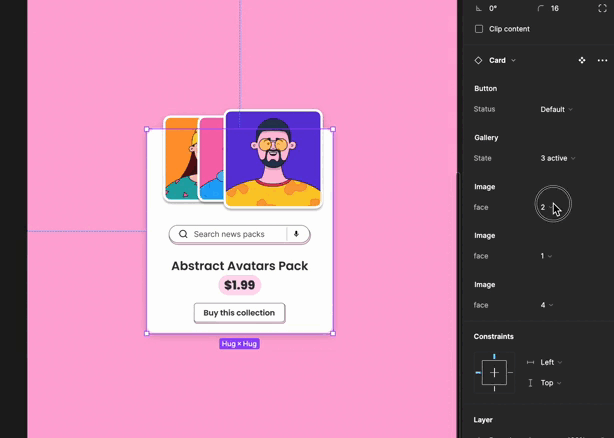
- Delegation. Have we delegated all necessary behavior to the corresponding parts? Is my card component only handling what it should be handling? For example, in our case, the only thing the card handles is the hover state and the showing or hiding of the button and search field. We delegate all responsibility for the hover and thumbs arrangement to the gallery component. Similarly, the button handles its own states, as does the search, and any other logic that doesn’t belong to the card. For each property or functionality you may want to add, ask yourself: Is this property directly related to my component?
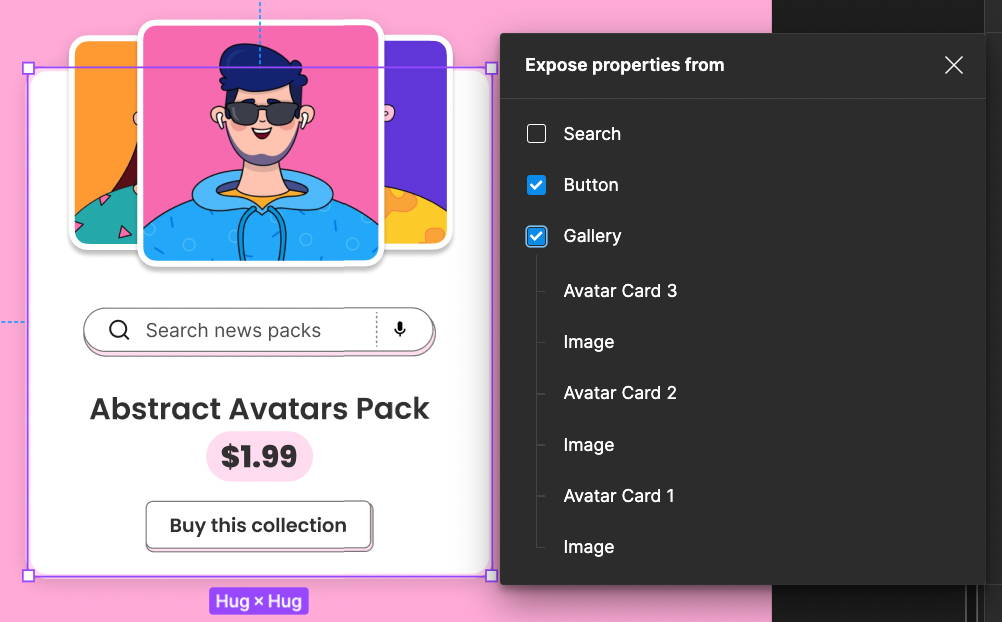
- Which properties “bubble up”. As you know, we are injecting nested instances (other components) within our card component, and those may or may not have their own properties. So it’s our job, based on the specs and our understanding of what our component will do, to determine if those properties should “bubble up” (be accessible from our card component). For example, if my card component will use a button, I would like to be able to change the button’s states or type from my card without going through the clicking nightmare until I find my button inside. However, we also need to exclude things that aren’t needed. For example, imagine that I’m nesting a content component inside my card . This component could bring any sort of content and logic, which I may not want to handle on my card, so it’s best not to bubble up those nested properties.
4. Test it
Needless to say, when we think we have completed a task, we often find that there is still more to do. Now it’s time to use our work, put it on our screens, and see how it relates to the other elements. More importantly, we need to feel it, use it, adjust its properties, and adapt it to different scenarios.
This phase is crucial. It’s like buying a new car — you need to test-drive it first. After purchasing it, you need to break in the engine and get used to it. You may need to adjust the seat, mirrors, and your reflexes to its new dimensions. Maybe this example is a bit strange… but you got the idea 😛.
5. Learn your lessons

There’s no need to state the obvious: whether things go as expected or not, you’ll learn from both experiences. Embrace both moments, as they will give you infinite knowledge. Be open to receiving it, and avoid flying on autopilot.
Store your design patterns. This is something I learned the hard way. As designers, we create numerous buttons, cards, inputs, icons, and other elements. It’s important to standardize and improve your repetition across different projects. Remember this, as it will save you a lot of time. If you can store these templates and reuse them when creating something new, you’ll be miles ahead of others.
Summary
The idea here is to deconstruct something that is obvious and always running in the background of our brains. However, since it is always running in the background, it sometimes goes unnoticed and contains errors due to faster execution times and a focus on outcomes rather than consistency.

Try this method a few times while engaging with complex components. You will see how this process slowly starts to develop in your mind. Soon, what used to run in the background will become more instinctual and closer to your conscious thoughts, making you less prone to errors.
Figma File with example: Figma Link 🔗
Figma Example
For those who wish to understand a bit better, or just copy paste and see the structure running, I just created a file on Figma 🔗, hope it helps to clarify all the words here :)
I hope you found this information useful, and I welcome any challenges to my decisions with better solutions in the near future. 👋🏻


